Clone and Create
Overview
The main use of “clone and create” is to create process activities by linking the project plan and GSI. This helps with a reduction in time consumption on creating tasks with redundant names under each phase. This allows the user to create tasks with unique names, rather than duplicating the tasks with the same set of names, under different phases.
How to Create Process Activities using Clone and Create
In the Project Hub, the user should get into the Clone and Create page. Here, the user must follow three major steps to create the process activities namely:
- Select Items
- Select Simulation Template
- Update Simulated Items
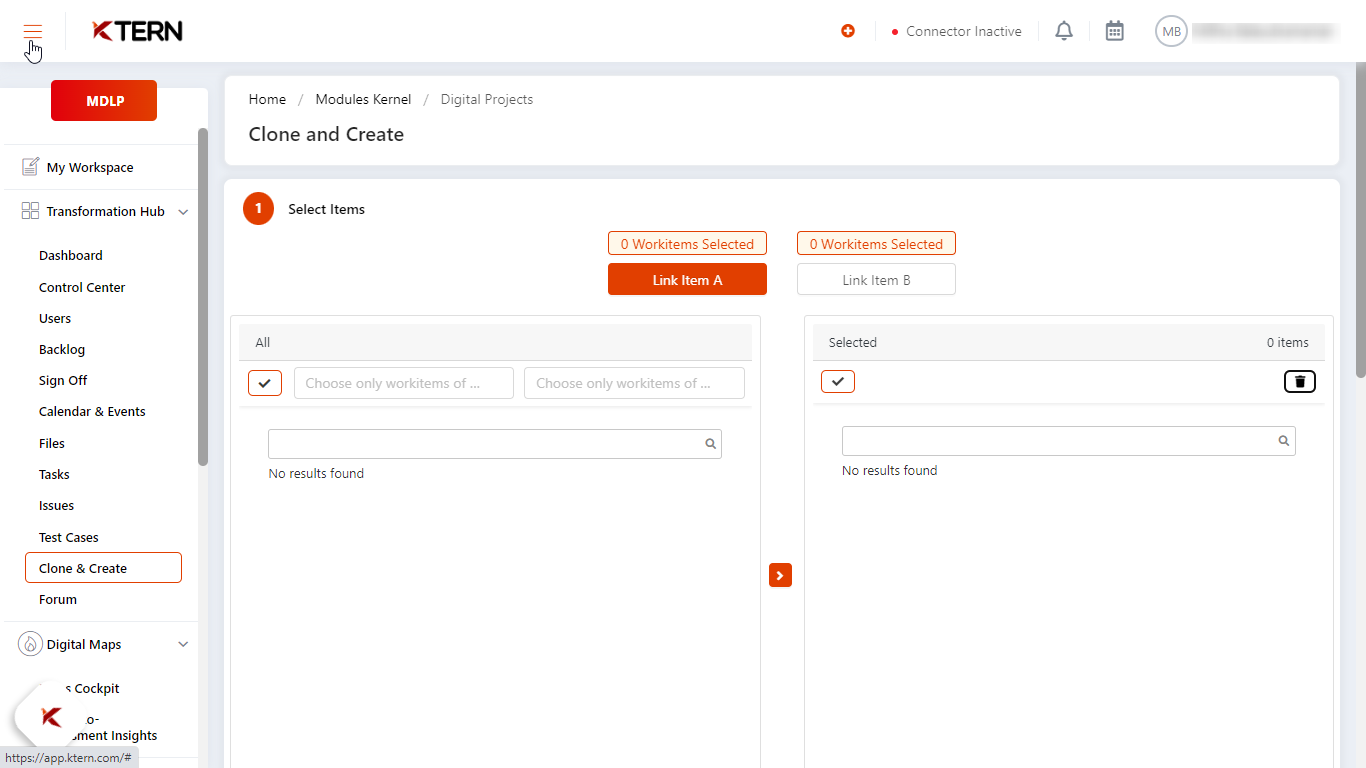
STEP 1: Select Items
i. Click Link Item A
Choose any of the work items as below:
a. If the work item is “Project plan”, then it can be mapped to any one of the work items like: Phase, Work Package, Task L1, Task L2, Task L3, and Task L4.
b. If the work item is “Backlog”, then it can be mapped to a work item called: User Story.
c. If the work item is “Global Scope Item”, then it can be mapped to any one of the work items like: Line Of Business, Process Group, Scope Item, Scope Item Variant and Process Step.
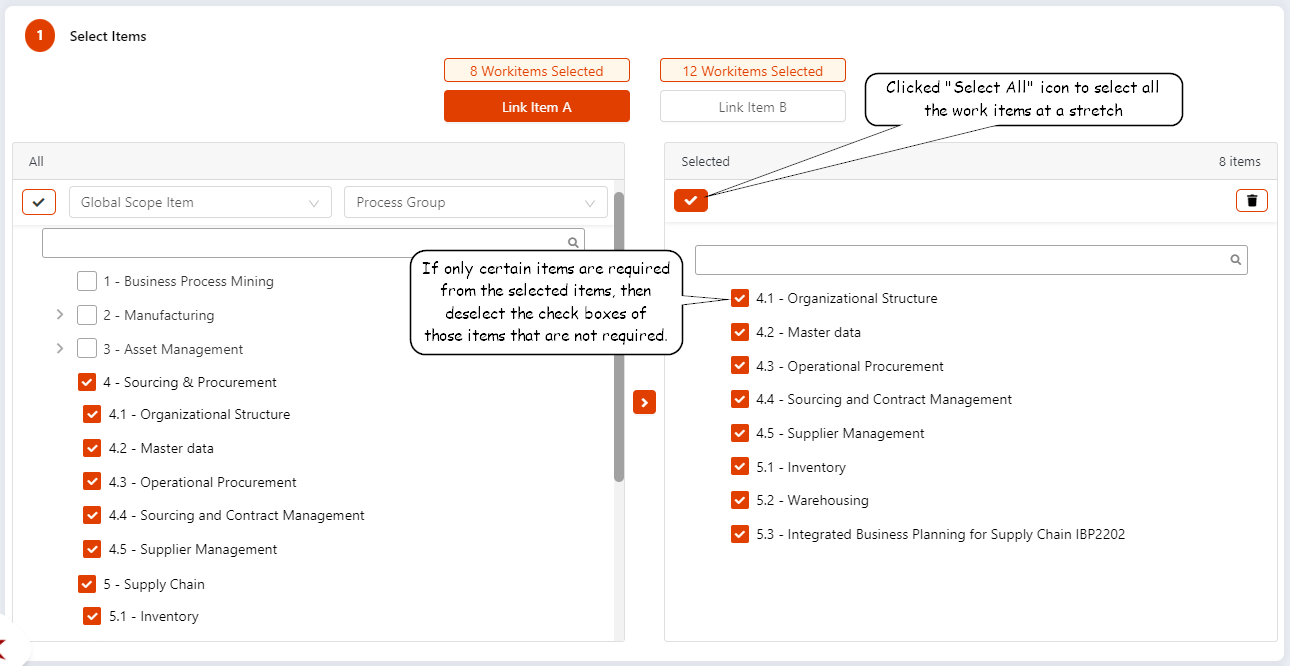
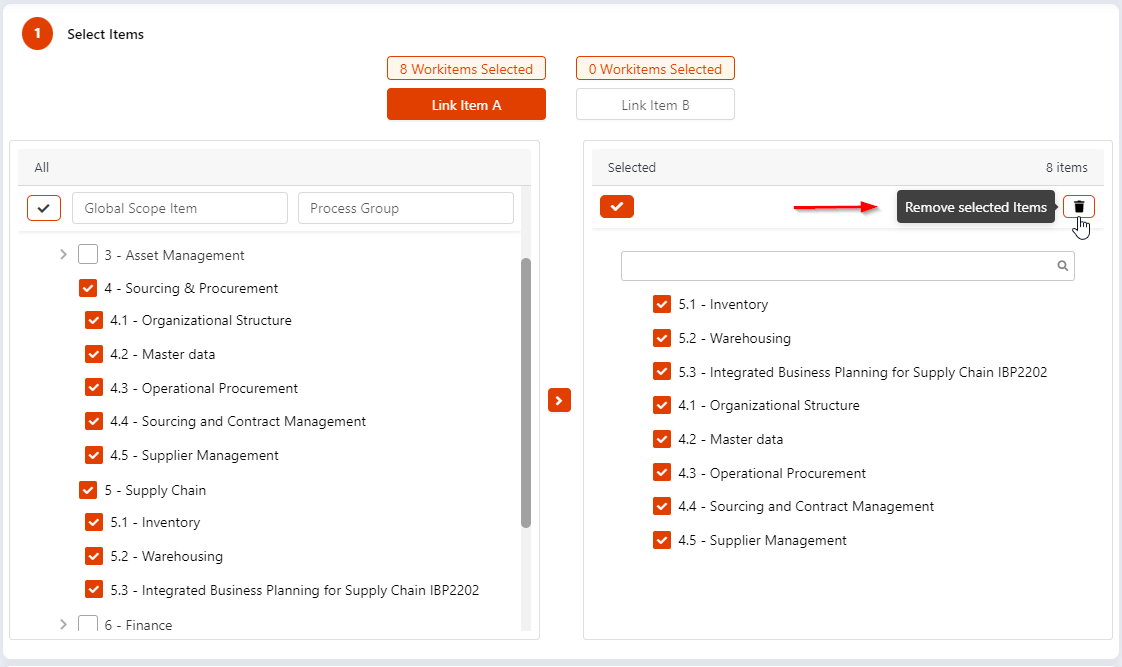
After choosing the work items, select the greater than symbol (>) to bring out the chosen items into the selected items list, which is present in the right side.

As shown in the below image, the “Select All” icon is used to select or deselect all the work items.

If only certain items are needed to be brought in, then deselect the check boxes of concerned work items that are not required.
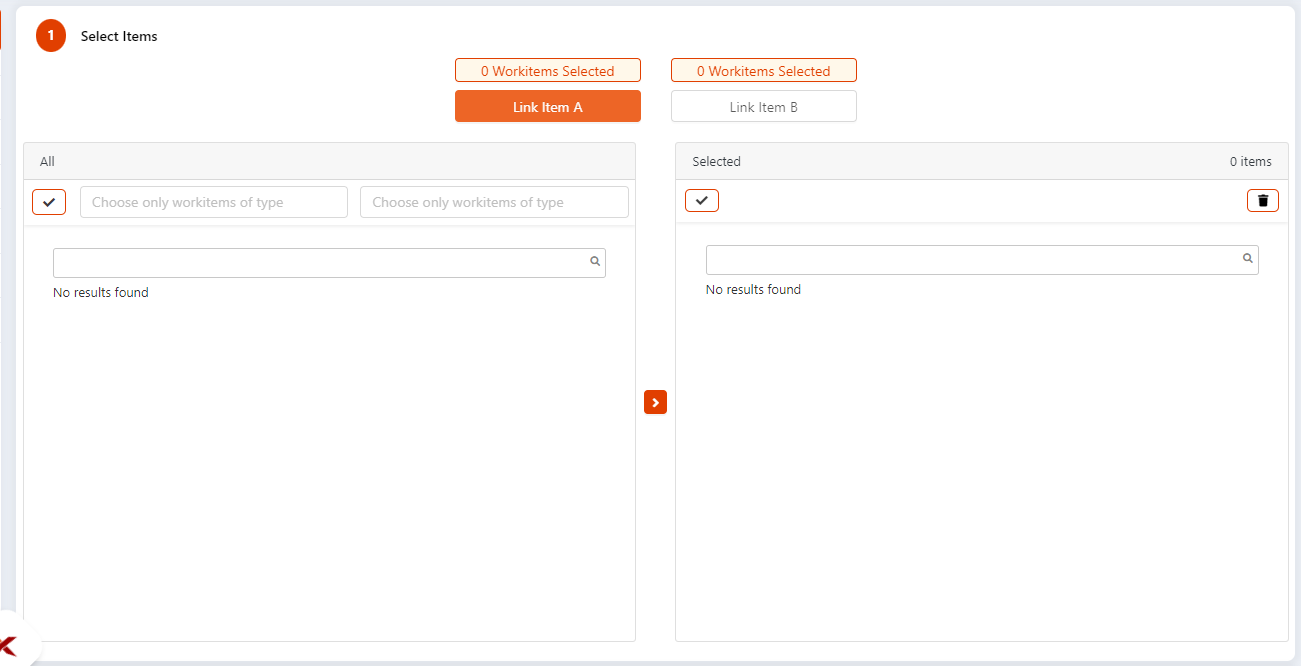
After deselecting the respective items in the selected list, the user can remove the items by clicking the delete icon. As in the below image, if all the items are required to be removed, click “Select All icon” and press the delete icon.

As shown in the below image, the items are deleted.
ii. Click Link Item B
Choose any of the work items as done for linking the Item A.

STEP 2: Select Simulation Template
In the below templates, the user can choose their required template or create a new template.
i. Choosing the available template
As shown in the below image, if a user wants the New Default Template. They could choose that template by clicking the icon which is present nearer to the launch icon.

ii. Creating a new template
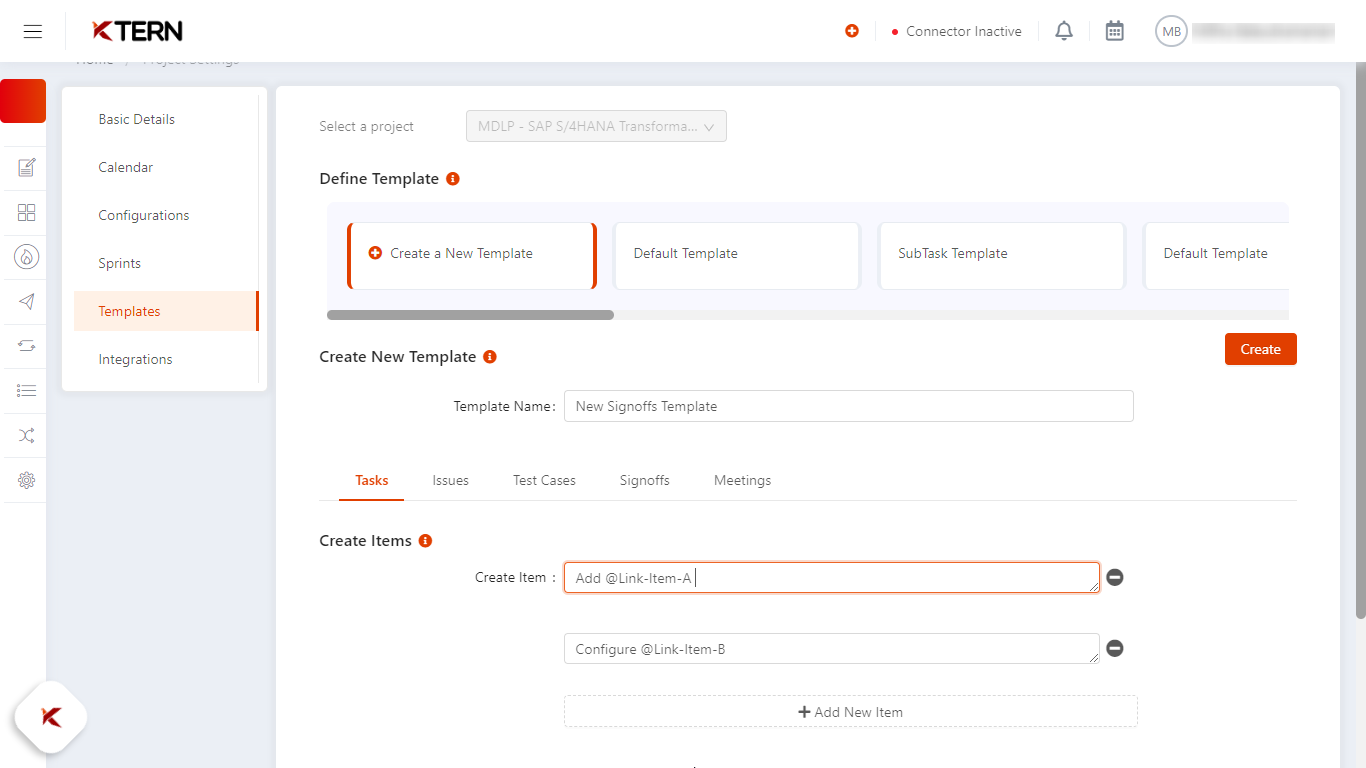
Click on the user name present in the top right corner. Get into Project settings.

On clicking the “Create a New Template” a new screen will be appearing towards the bottom part.

Name the template and add the format of the items to be created. Under rules, KTern allows you to choose certain rules that can be applied during the creation of items. The user needs to choose the value as link item A or link item B to which the user wants to apply the above rule.

As shown in the below image, if a user could view the newly created template name as New Signoffs Template. They could choose that template by clicking the icon which is present nearer to the launch icon.

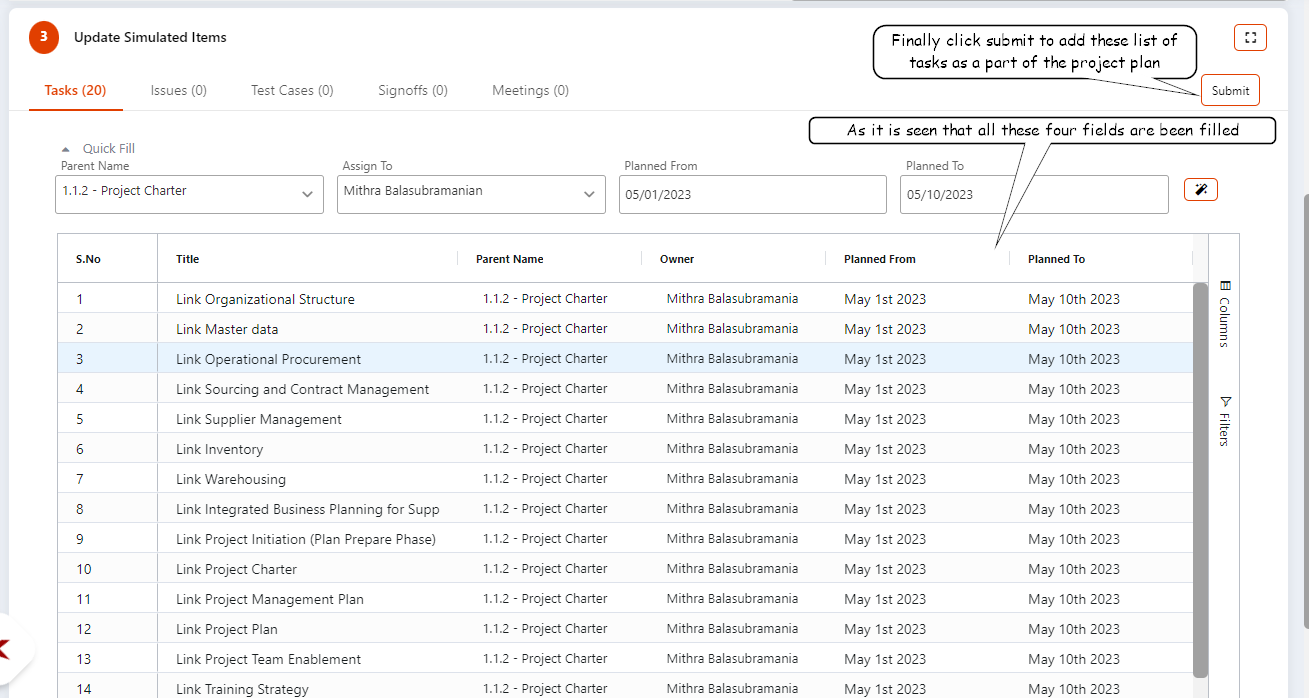
STEP 3: Update Simulated Items

Once after choosing the template, this screen will be visible, where there’ll be list of tasks in which project plan and process are been cloned. KTern provides a benefit with “Quick Fill” option, where the user could fill the following columns in a single click: Parent Name, Assign To, Planned From, Planned To.
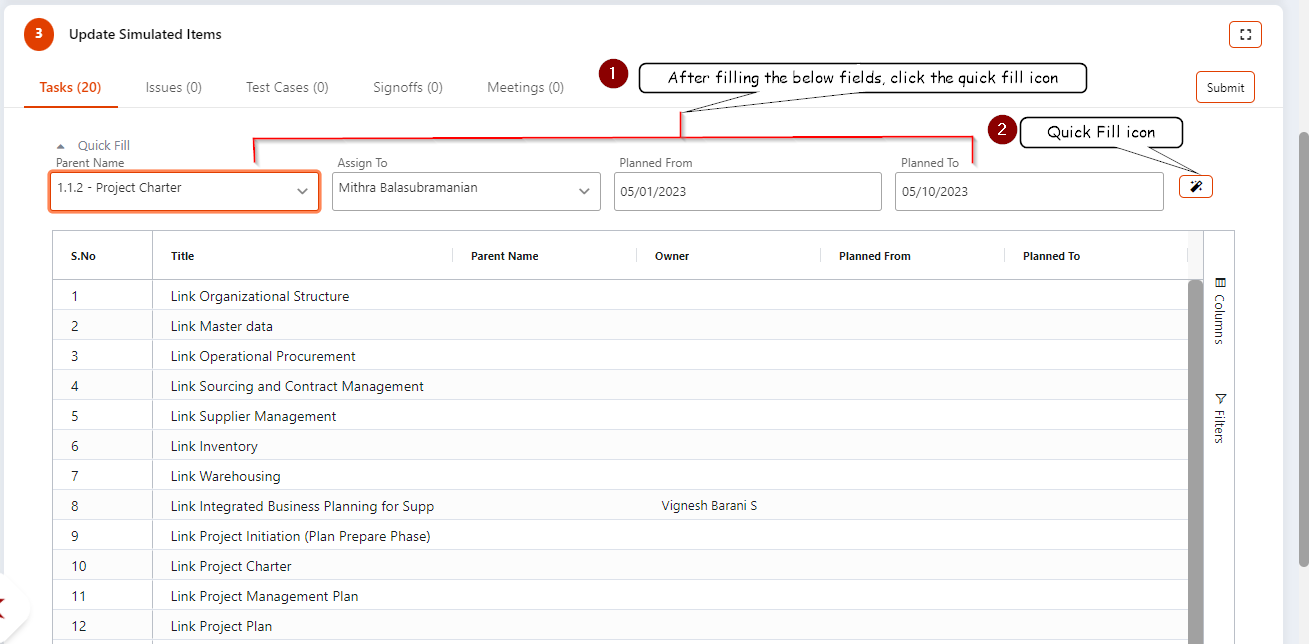
Post filling the four boxes of quick fill, all those data will be auto filled in all the rows of the chosen parent task.
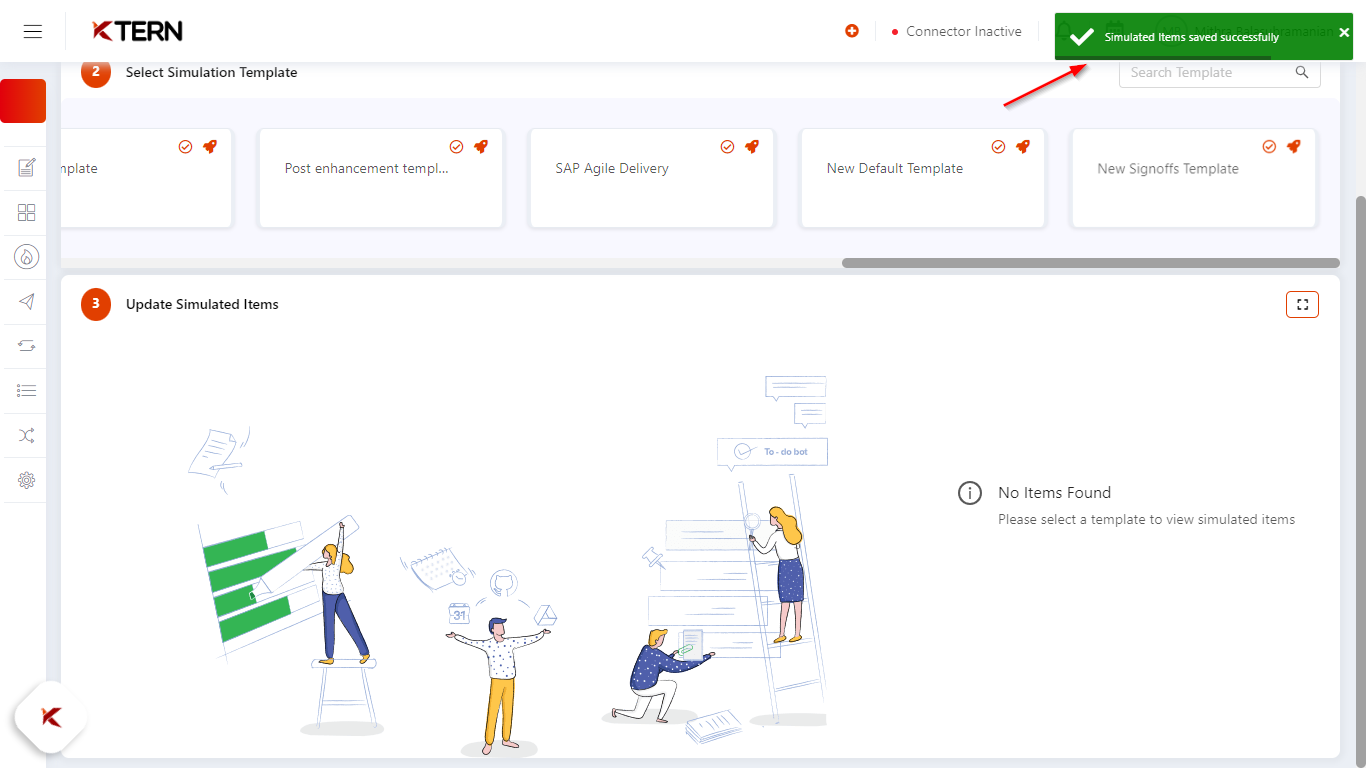
Once the process activities are created under the task, a pop up message will be coming that “Simulated Items saved successfully”.