Signoffs
Overview
In KTern, signoffs refer to the process of reviewing and approving assets such as documents, procedures, policies and other types of content. Signoffs are used to ensure that the content is accurate, up-to-date, and compliant with organizational standards and requirements.
- A project sign-off is a crucial step in formally closing a project or acknowledging the delivery of a key deliverable.
- A sign-off sheet is a document that is signed by all stakeholders involved in the project. It includes: a. The project’s intended goals and whether they were met or not. b. The project’s key deliverables and whether they were actually delivered. c. Any comments and observations from stakeholders, if any. d. The project start and end dates.
- All involved parties sign the document, formally and legally closing the project.
- For complex projects, the sign-off sheet may run into dozens or even hundreds of pages. In some cases, such as government contracts, “sign-off books” may be used instead of sheets.
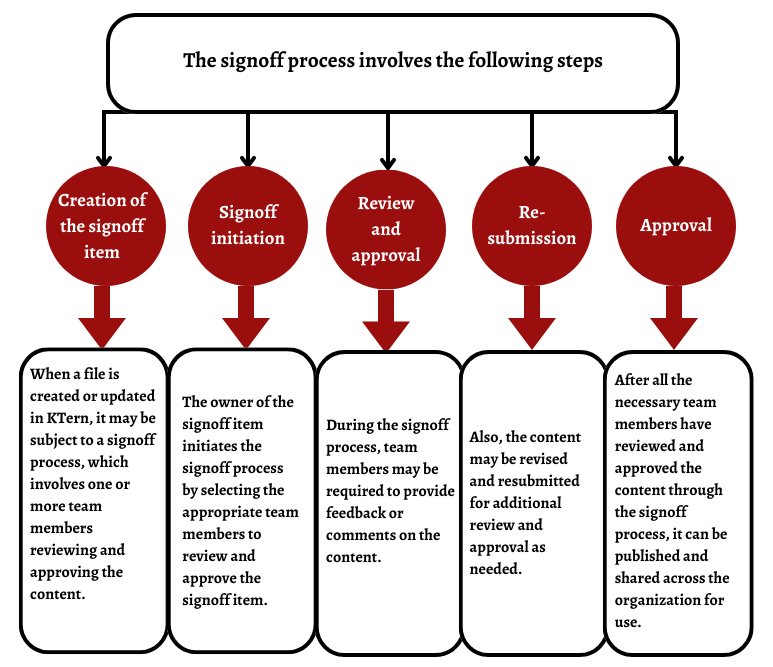
Steps involved in signoff process
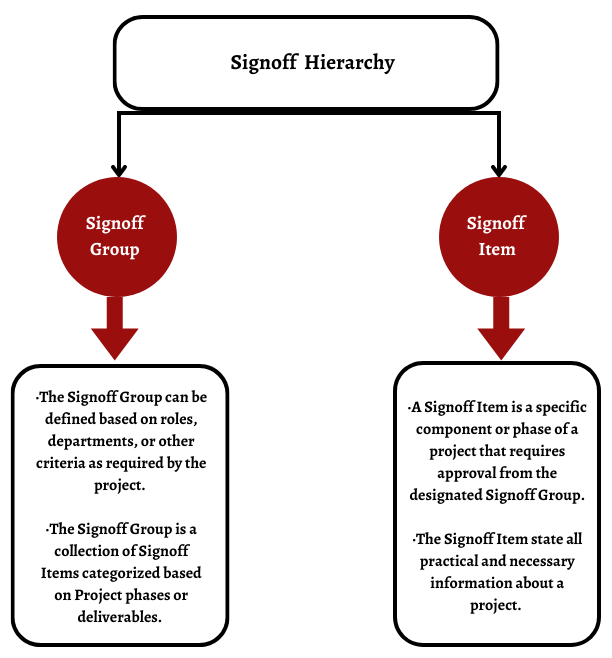
Signoff Hierarchy
The signoff hierarchy in KTern ensures successful project or task completion by requiring approvals at increasing levels of the organizational hierarchy. This guarantees that relevant stakeholders review and sign off on the work before considering it complete.
In addition to the Signoff Hierarchy, there are two components to be considered in Signoff Management in KTern.
Benefits
- Ensuring accountability and responsibility for business objects or any assets.
- Promoting consistency by ensuring all team members follow the same standards and procedures.
- Facilitating knowledge transfer and reducing knowledge gaps.
- Improving the quality of documents by providing a mechanism for feedback and review.
- Streamlining workflows and reducing administrative burden on team members.
- Providing a clear record of who has reviewed and approved a particular document or asset.
- Helping to comply with regulations and industry standards.
- Encouraging collaboration and communication among team members.
- Reducing errors, omissions, and other issues before they become bigger problems.
- Enhancing transparency and traceability of files or assets.